
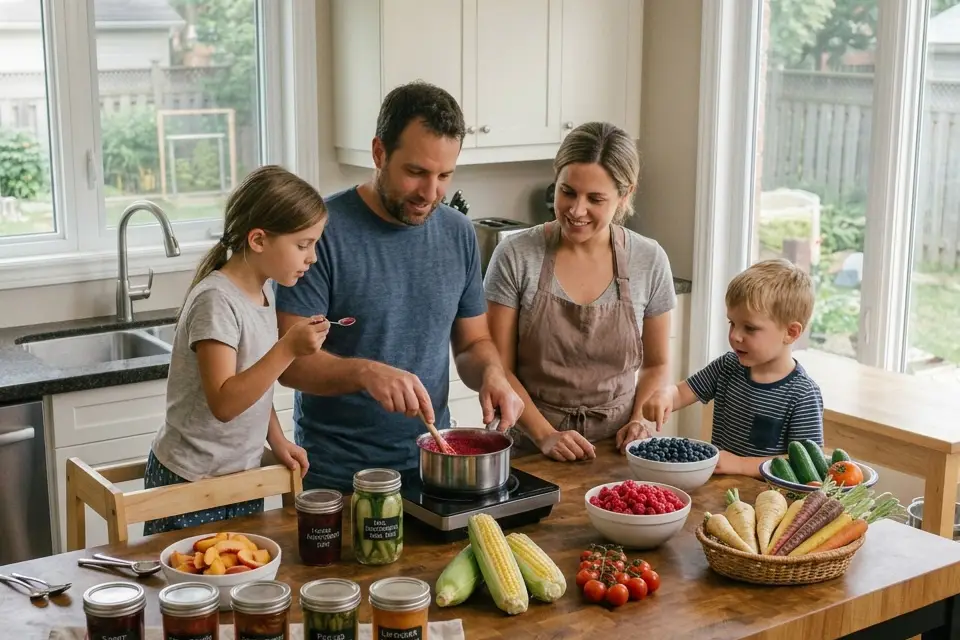
There is nothing quite like a Canadian summer. From the sun-warmed raspberries of British Columbia's Fraser Valley and Alberta's saskatoon berries to Ontario's sweet field corn and Atlantic Canada's legendary wild blueberries, our farm stands and farmers' markets are bursting with vibrant produce.
When cool autumn breezes begin to roll in, holding onto those bright, sun-drenched flavors can feel like a race against the clock. The good news? You don't need an all-day canning marathon, specialized equipment, or a basement full of mason jars to preserve the local harvest. Food preservation isn't an all-or-nothing proposition - it's about simple, low-stress tweaks that let you enjoy local goodness straight through the winter months.
Whether you're a seasoned locavore or a weekend market browser, this step-by-step guide to quick-pickling, small-batch jamming, and flash-freezing will help you bottle up the best of summer without the fuss.
1. Quick-Pickling Peak-Season Veggies (No Canning Pot Required)
If traditional hot-water canning feels a bit intimidating, refrigerator pickling is your best friend. Quick-pickling delivers all the crisp, tangy satisfaction of classic pickles without the need for precise sterilizing routines or special canning pressure gear.
Best Local Produce to Try
-
Cucumbers & Green Beans (classic dill spear or "dilly bean" style)
-
Radishes & Red Onions (incredible on tacos, burgers, and grain bowls)
-
Carrots & Cauliflower (crunchy, vibrant snacks)
Step-by-Step Quick-Pickling
-
Prep Your Veggies: Wash and slice your chosen vegetables into bite-sized coins, spears, or thin ribbons. Pack them tightly into clean glass jars, leaving about half an inch of space at the top.
-
Build Your Aromatics: Toss spices directly into the bottom of each jar before packing the veggies. Try peeled garlic cloves, fresh dill sprigs, mustard seeds, peppercorns, or red pepper flakes for a kick.
-
Make the Simple Brine: In a small saucepan, combine equal parts water and vinegar (white vinegar, apple cider vinegar, or rice vinegar work great). For every 1 cup of water and 1 cup of vinegar, add 1 tablespoon of coarse salt and 1 tablespoon of sugar or Canadian maple syrup.
-
Simmer and Pour: Bring the brine to a brief simmer until the salt and sugar dissolve. Pour the hot brine carefully over your packed vegetables, ensuring they are fully submerged.
-
Cool and Chill: Let the jars cool to room temperature on the counter, screw on the lids, and pop them into the fridge. They'll be ready to eat in 24 hours and will keep their signature crunch for 3 to 4 weeks.
2. Small-Batch Berry Jamming (Fresh Fruit Flavor First)
Traditional jam recipes often call for massive sugar ratios and hours of stirring giant boiling pots. Small-batch jamming flips the script: by working with just 3 to 4 cups of berries at a time, you keep the cooking time under 30 minutes and let the pure, natural sweetness of ripe local fruit shine through.
Best Local Produce to Try
-
Strawberries, Raspberries, and Blackberries
-
Wild Blueberries and Saskatoon Berries
-
Stone fruit like Niagara Peaches or Plums
Step-by-Step Small-Batch Jam
-
Prep the Berries: Wash 3 to 4 cups of fresh, ripe local berries and trim away any stems or leaves.
-
Combine with Sugar and Citrus: Place the fruit into a wide skillet or heavy-bottomed saucepan. Add 1/2 to 3/4 cup of granulated sugar (adjust based on how sweet your fruit already is) and 1 to 2 tablespoons of fresh lemon juice. The natural acid in lemon juice helps the jam set while balancing the sweetness.
-
Simmer and Mash: Heat the mixture over medium-high heat. As the berries warm up and release their juices, use a potato masher or fork to gently crush them to your preferred texture. Bring the mixture to a rolling boil.
-
Test the Set: Stir frequently for 10 to 15 minutes as the liquid reduces and thickens. To test if it's done, place a small spoon of jam onto a chilled plate from the freezer. Wait 30 seconds and push it with your finger - if it wrinkles slightly, your jam is ready!
-
Jar and Store: Ladle the hot jam into clean jars. Once cooled, keep it in the fridge for up to a month, or leave an inch of headspace at the top of freezer-safe jars and freeze for up to 6 months.
3. Flash Freezing Local Harvests (Lock in Peak Freshness)
Throwing a big bag of freshly picked berries or chopped veggies directly into the freezer usually ends in disaster: one giant, icy block of produce. The flash-freeze method prevents clumping, allowing you to easily scoop out a single handful of berries for morning oatmeal or a portion of sweet corn for a winter stew.
Best Local Produce to Try
-
Whole Berries (blueberries, raspberries, saskatoons)
-
Sweet Corn, Chopped Bell Peppers, and Peas
-
Hearty Greens (kale, spinach, Swiss chard)
Step-by-Step Flash Freezing
-
Wash and Dry Thoroughly: Clean your produce well. Crucial step: Make sure everything is completely dry before freezing. Moisture on the surface creates freezer burn and ice crystals.
-
Blanch (For Select Veggies Only): Delicate berries and peppers can be frozen raw. However, veggies like green beans, corn kernels, and leafy greens benefit from blanching - boiling them for 1 to 2 minutes, then plunging them into an ice bath to preserve their bright color, texture, and nutritional value. Dry thoroughly after blanching.
-
The Single-Layer Tray Freeze: Line a baking sheet with parchment paper. Spread your berries, corn kernels, or chopped veggies in a single layer, making sure the pieces aren't touching each other.
-
Freeze Solid: Place the tray flat in your freezer for 2 to 4 hours until the produce is frozen firm.
-
Package and Label: Transfer the frozen items into airtight freezer bags or reusable silicone pouches. Squeeze out as much excess air as possible, label with the contents and date, and store flat. They'll stay fresh for 8 to 12 months!
Locavore Tips for Preservation Success
-
Buy at the Peak: Connect with local growers at your nearest farmers' market when crops are in peak harvest. Produce is at its lowest price and highest quality when farms have abundance.
-
Ask Your Farmer: Not sure which tomato variety makes the best sauce or which berry holds up best in the freezer? Don't hesitate to ask the people who grew it - local farmers are a wealth of culinary knowledge.
-
Start Small: Don't feel pressured to preserve an entire pantry's worth of food in one weekend. Taking 20 minutes to pickle a jar of red onions or freeze a tray of strawberries each week slowly builds up a delicious winter stash.